

Method 1: The Official Plugin (Recommended)
1
Install the Plugin
Click the blue Download Plugin button on the WebRadioPlayers dashboard to get the
.zip file, or search for WebRadioPlayers directly in your WordPress Plugin directory. Install and activate it.2
Configure the Plugin Settings
In your WordPress admin dashboard, navigate to Settings > Web Radio Players.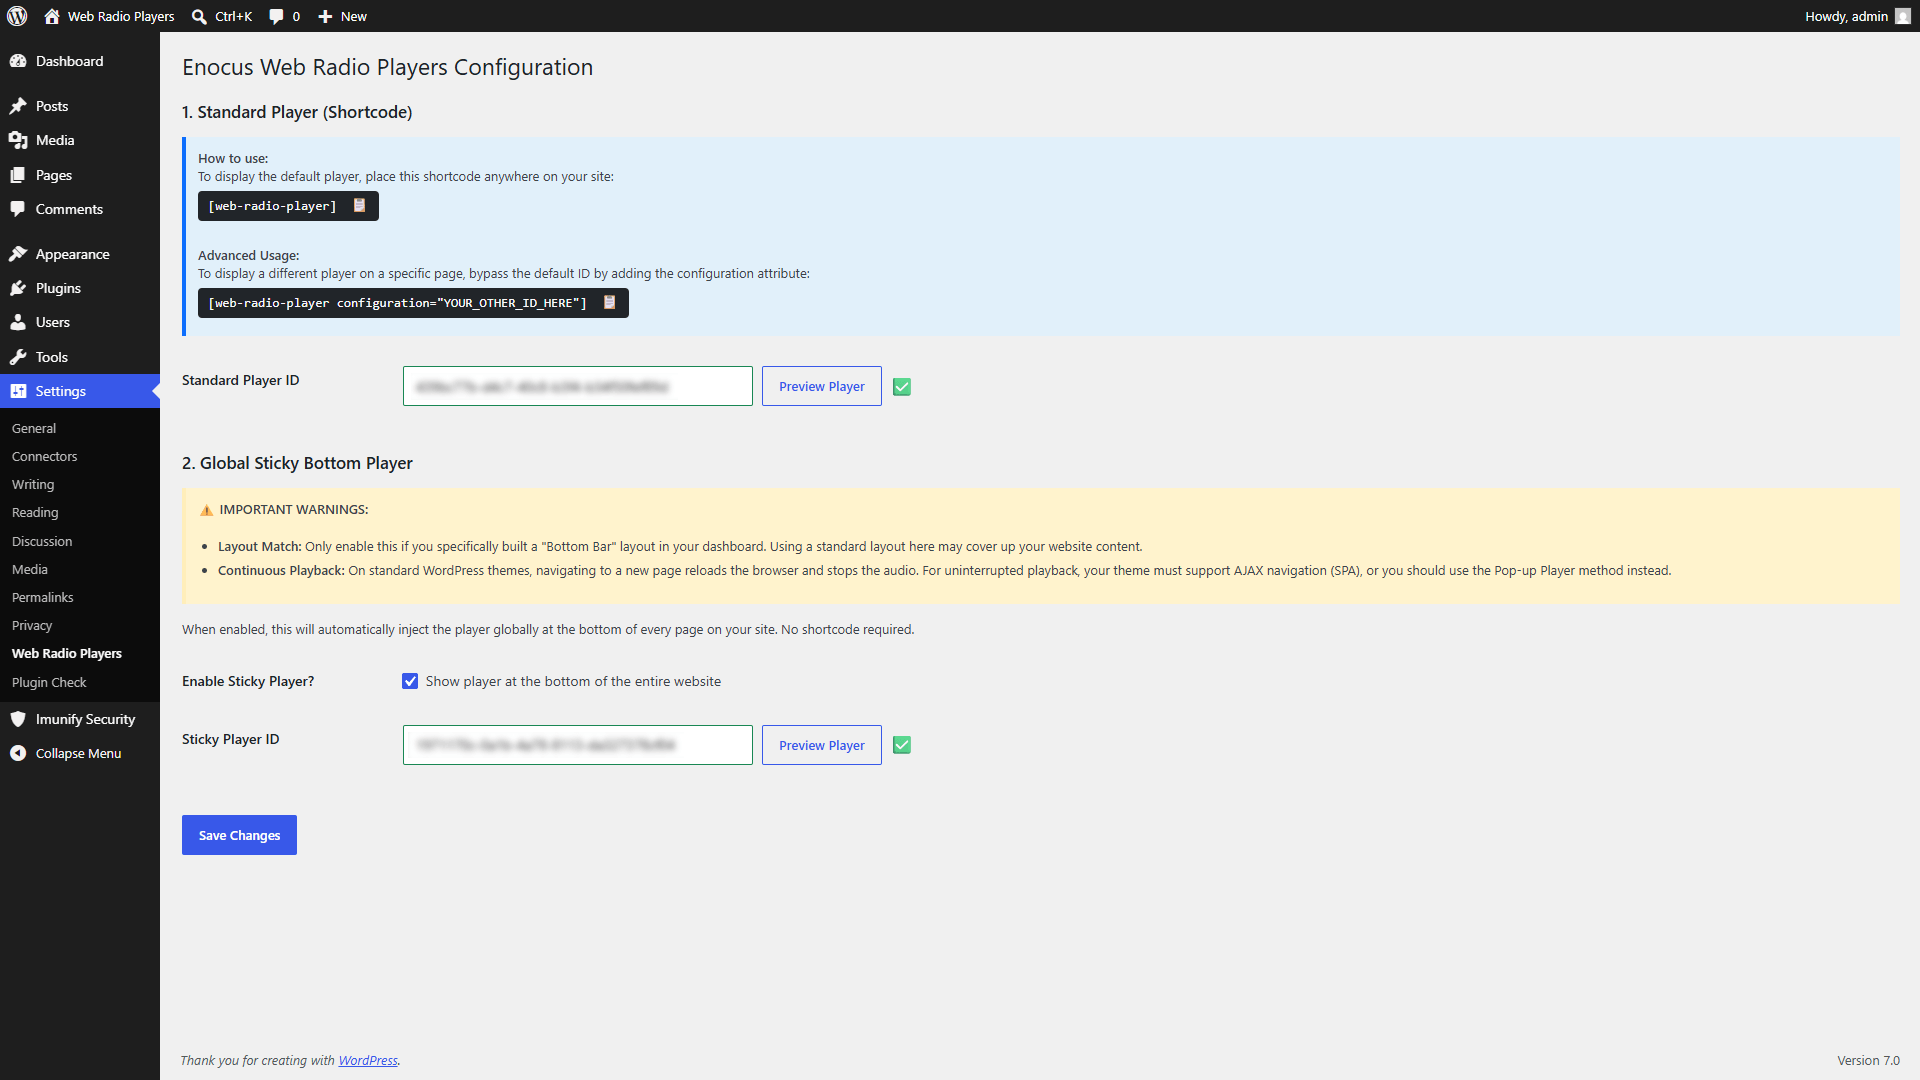
Option A: Standard Player (Shortcode)
Best for placing players inside specific blog posts, pages, or sidebar widgets.- Paste your Unique Player ID into the Standard Player ID field.
- Click Preview Player to verify the connection. If the ID is valid, a green checkmark will appear.
- Simply type the shortcode
[web-radio-player]anywhere on your site to display it. - Advanced: If you have multiple streams (e.g., a dedicated Jazz player for one page and a Rock player for another), you can bypass the default ID by using:
[web-radio-player configuration="YOUR_OTHER_ID_HERE"].
Option B: Global Sticky Bottom Player
Automatically injects a persistent player at the bottom of every page on your website without needing to place any shortcodes.- Check Enable Sticky Player and paste your ID into the Sticky Player ID field.
3
Save Changes
Click the blue Save Changes button at the bottom of the screen to push your player live.
Method 2: Custom HTML Block (Alternative)
If you prefer not to install another plugin, you can embed the player directly into a specific page or post using native WordPress blocks.- Open your WordPress page editor (Gutenberg).
- Add a new Custom HTML block where you want the player to appear.
- Copy the combined HTML code block from your WebRadioPlayers dashboard and paste it into the block.
- Click Preview or Publish.
Theme Conflicts: Some WordPress themes or caching plugins (like Autoptimize) may strip
<script> tags from Custom HTML blocks. If your player doesn’t load using Method 2, please switch to the official plugin in Method 1.