> ## Documentation Index
> Fetch the complete documentation index at: https://docs.webradioplayers.com/llms.txt
> Use this file to discover all available pages before exploring further.
# Getting Your Embed Code
> Finalize your configuration and choose how you want to deploy your widget.
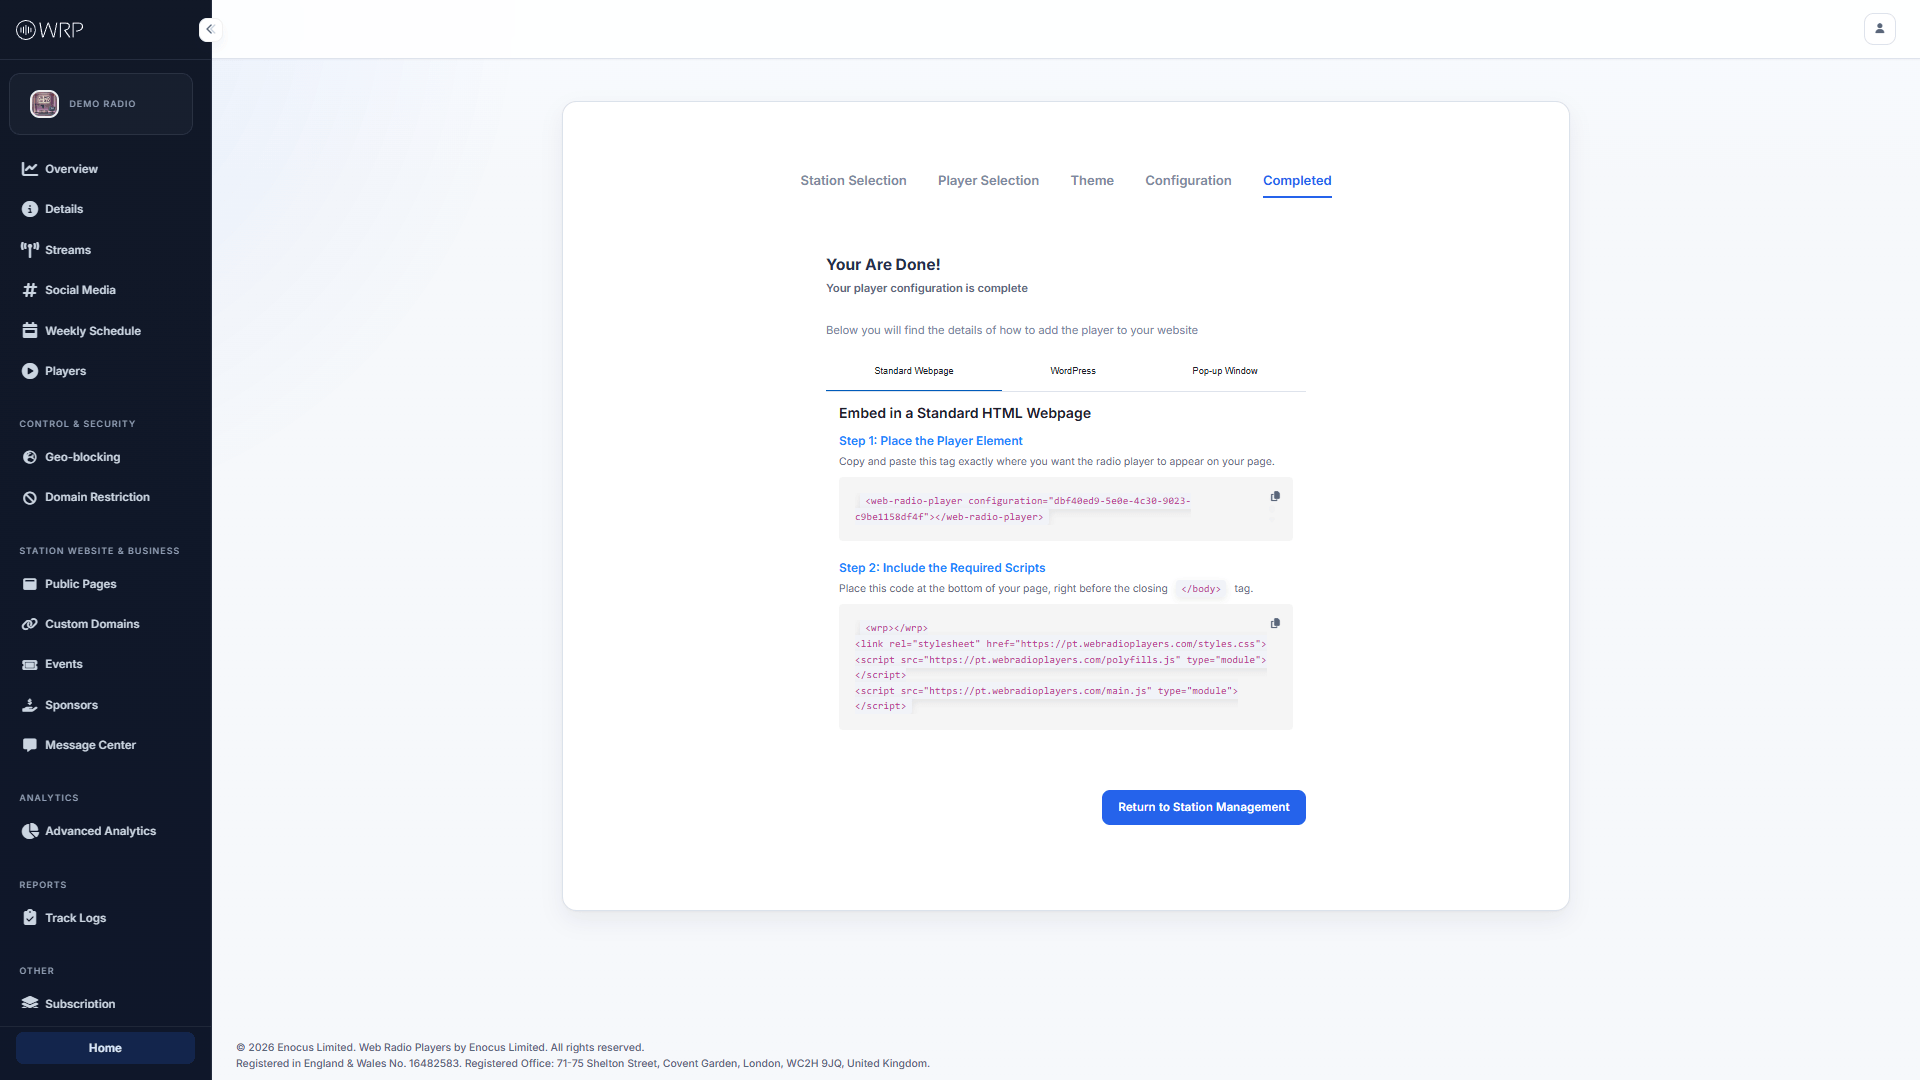
When you click **Finish** on the Configuration step, your player is officially saved to our servers, and you are brought to the **Completed** screen.
This dashboard generates the unique snippets of code required to make your player appear on your website.
 ## Choose Your Deployment Method
Because every website is built differently, we provide three distinct ways to integrate your new player. The dashboard is split into three tabs.
Select the platform you are using below to see the exact step-by-step instructions for your website:
For custom websites, Webflow, Ghost, or any site where you can edit the HTML `` and ``.
For WordPress sites using our official plugin or native Gutenberg Custom HTML blocks.
Launch a dedicated, resizeable pop-up window so music continues playing as users browse your site.
## Choose Your Deployment Method
Because every website is built differently, we provide three distinct ways to integrate your new player. The dashboard is split into three tabs.
Select the platform you are using below to see the exact step-by-step instructions for your website:
For custom websites, Webflow, Ghost, or any site where you can edit the HTML `` and ``.
For WordPress sites using our official plugin or native Gutenberg Custom HTML blocks.
Launch a dedicated, resizeable pop-up window so music continues playing as users browse your site.